If you’ve read some of our previous posts, you’ll have noticed a trend. People in our house love coffee. So this design isn’t anything particularly groundbreaking or original here, but I saw some neat concepts similar to this and thought “I’d like to give that a go.” So without further ado: the Pipe Pour Over.


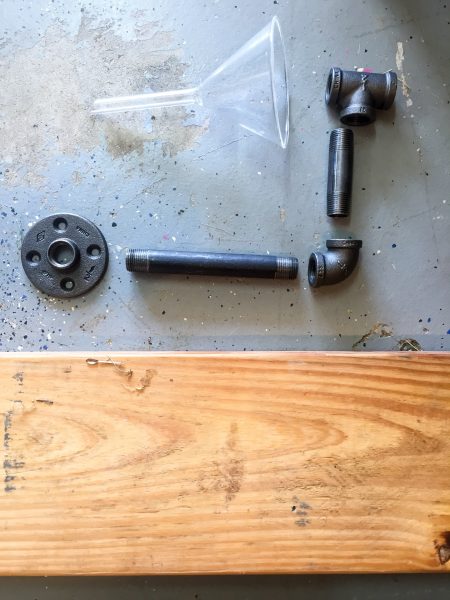
The main components.
Required Parts
How to Build
First: Cut the board down to size. For mine, I used a 2″ x 10″ x 16″ piece and it’s definitely on the larger size. I ultimately added in a coffee filter holder on the side since I had extra room, but you could go with 2″ x 10″ x 12″ and be just fine.
Then: Sand the board down thoroughly so that its really smooth. Start with 120 grit if its rough wood and work your way up to 220 grit (at least) for a soft finish. You’ll want this to be free of any splinter potential since people will have their hands all over this thing.
Next: Finish the block with the stain color of your choice. Apply with either a staining rag or a foam application brush. I prefer to wear blue plastic gloves and use staining rags since it’s cheaper. If you prefer: wait until the stain dries and apply a polyurethane or butcherblock finish.


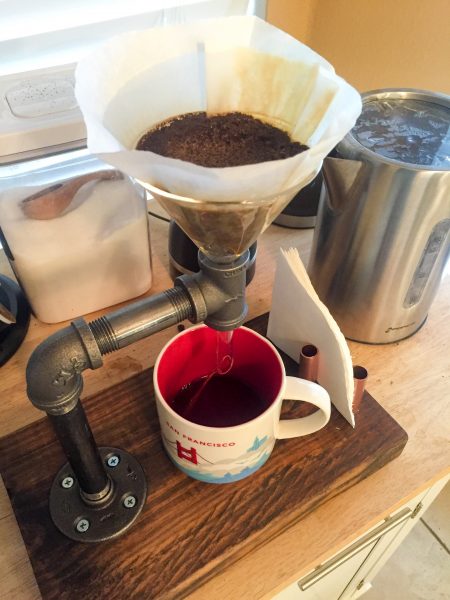
Making the first cup.
Start assembling your pipe. Start with the flange and add the longest pipe to be your vertical piece, then the 90 degree connector, then the shorter length pipe, then the T connector.
Attach the flange to the block with four screws. My flange is 1″ in from the side edge and is centered in the middle. The T connector should overhang just about the middle of the block.
Stick 4 rubber/felt feet on the bottom to protect whatever surface you put this on.
Slide your glass funnel down into the T connector and put in a coffee filter and you’re ready to go!
Bonus: Filter Holding Area
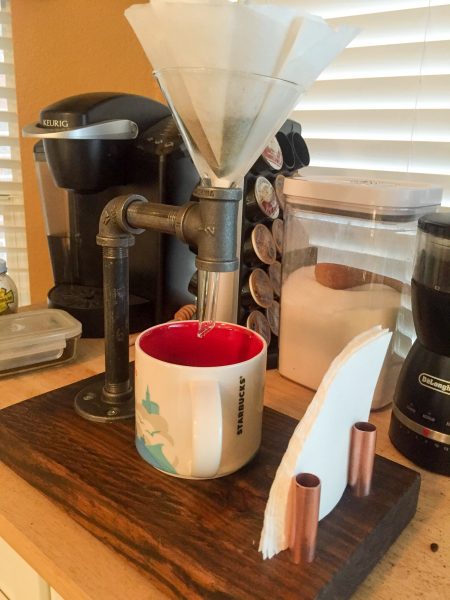
If you have a bit of space on the end, you can add an area for holding filters. Mine is composed of three simple 2 1/2″ copper pipe sections that I cut and stuck down in a 3/4″ hole drilled by a forstner bit. The three holes are not quite in a line: the middle one is offset just a bit so that the filters don’t have to bend much, but there is just a little bit of pressure on them to keep them together. Each pipe is 2″ from the next. See the diagram for more details.


A look at the filter holder.
To actually make coffee:
- Put a new filter in the funnel.
- Boil a kettle of water: we use an electric kettle.
- Grind your beans (enough for just one cup) and put in the filter.
- Slowly pour the hot water over the grounds and let trickle into a cup below. A trick is to let the coffee “bloom”: get the grounds wet thoroughly and then wait for 30 seconds. The grounds will begin to expand from the hot water, creating more surface area for the next round of water to extract more coffee goodness from the beans. Your patience will be rewarded with a richer, more flavorful coffee.
Support us on Patreon!
I hope you've enjoyed this tutorial! Please consider donating on our Patreon page! The more money we raise, the bigger and more elaborate project tutorials we can do for you!
Check out the Patreon Page
