
Everyone loves the sound of water trickling: its relaxing, soothing, and transports us to a warm, sunshiny place out in the woods near a stream where we can get away. The trouble is: recreating this feeling and sound at home while at the same time not spending a fortune. I’ve wanted a fountain at our house for a long time, and I finally bit the bullet and built a small pond in the backyard (click the link to see the article on how to build that) but I also wanted our guests to hear that same sound and get that same feeling of peacefulness when they came to our house, so I created this project to go near the front door.
This version of a DIY simple fountain is designed with just that in mind: simplicity. I found a lot of tutorials online for create these elaborate and beautiful rock pillar fountains, or clay pots stacked up into a fountain, but I’m not going to flashy fountain here. This one is incredible simple, inexpensive, and almost hidden.
So let’s get down to it:
Required Parts
Components
- Pond Liner – This is more than enough for this project. This liner is enough for both this fountain and the backyard pond build in my other tutorials. The issue is this is just about the smallest pond liner you can buy.
- Fountain Pump – I’ve got two options here: a small 80 gph fountain pump for a simple spout of water (that I used), or a larger 520 gph pump capable of running a fountain nozzle and adjusting how much spray there is
- Fountain Nozzle Pack – if you decide to go with a bigger, more capable pump, this nozzle pack will do just about all the spray patterns you want. I prefer the water curtain effect.
- Tubing – You’ll need at least a few feet of tubing to reach from the bottom of the 5 gallon bucket up to the top, but may need some more if you want to use a fountain or flowerpot overflow technique.
- 5 gallon bucket – the main container for this project – you can definitely go bigger/deeper/more capacity
- Metal lid supports – the span on top of the 5 gallon bucket is too wide for just hardware cloth to hold up a bunch of heavy rocks, so you need some kind of cross supports, like metal spikes or rebar to support the weight.
- 1/4″ hardware cloth – this allows rocks to stay on top and lets water pass through you need rocks bigger than the holes in the hardware cloth, so if you want to use small pebbles, get something with smaller holes
- Rocks – I chose smooth river rocks of a natural color, but you’ll find tons of options at Home Depot. I also really like the solid, dark black rocks. Go with what makes sense to your garden. I needed 2 – 20 lb bags to cover up all hardware cloth and look natural.
- Weatherproof Electrical Connection Box – This box is designed to connect extension cords together somewhere that will likely get wet. Use this if your pump’s cord doesn’t reach an outlet, which is likely.
Specialty Tools
Disposables
How to Build
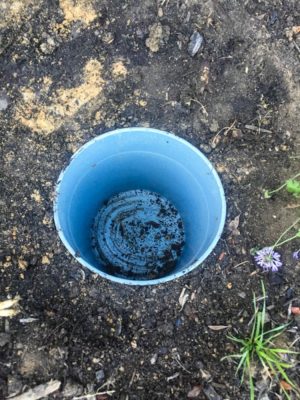
Step 1: Dig a big hole in the ground
Dig out a space big enough for your 5 gallon bucket to fit down inside, with a flat bottom.
The edges of the bucket should be perfectly even with the ground around it, and as you move away from the bucket, the ground should slope up.
This slope causes rain water to run towards the bucket, filling it up again, so you don’t have to quite as often. But you want a very mild slope so fast water doesn’t pull in a lot of extra dirt from the surrounding area.
Spend some time tailoring this to your site because you only want to do it once.
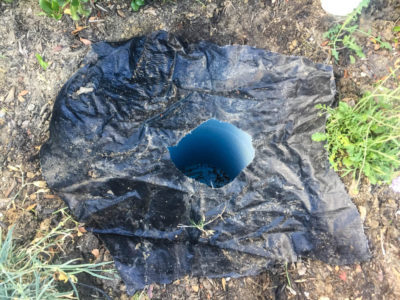
Step 2: Place pond liner around the edge of the 5 gallon bucket
This also needs to slope into the bucket from all angles, or else your fountain will drain the bucket very quickly and this’ll be more annoying to you than anything else. We need to make sure we recapture any water sprayed up into the air.
Test with a glass of water and just pour it around the edge, making sure it heads back into the bucket. It’s ok if it pools up near the edge of the rim somewhere. It’ll get back in there eventually.
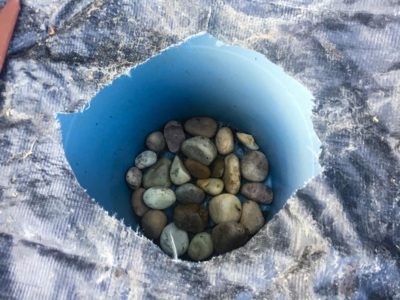
Step 3: Line the bottom of the 5 gallon bucket with at least 1 level of rock so the pump is not resting on the bottom.
That rain water is going to bring with it some dirt, and you don’t want that dirt getting sucked up into the pump and clogging it, the pipe, or the fountain head (if you use one).
A layer of rock will provide room for that dirt to fall into to keep it away from the pump.
Set the pump down inside with the electrical cord coming out underneath the pond liner, and make sure its connected to enough tubing to reach out the top of the rocks.
Step 5: Lay down 1/4″ hardware cloth over the opening and supports and then begin placing rocks.
Cover the entire top of the bucket, with some overlap onto the pond liner, with the hardware cloth.
I started with a big square, but the 4 corners stuck out much further than everything else, so I cut them down closer to the rim and made an octagon.
Stick your tubing up through the hardware cloth and secure it with a zip tie if need be.
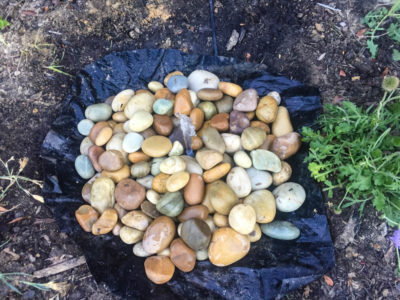
Then begin to arrange your rocks on top, largest rocks on bottom, and then stack the smaller ones in the gaps to totally cover the metal.
Step 6: Trim up pond liner and fill with water
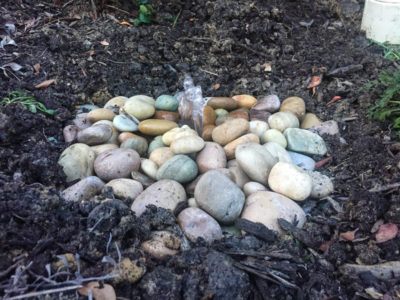
Now that you’ve got the rocks covering the metal cloth, you see how big this should be, and you can trim out the extra pond liner, and then cover the edges with more rock and soil/wood chips to blend it into the surrounding flower bed.
You want the rocks on top of the soil edge, and not a bunch of soil on the rocks, so it looks more natural and pretty.
Then plug in the pump to a nearby outlet and adjust the piping to squirt straight up!
Feel free to experiment with flow, angle, height, additional fountain tops, spray heads, or decorative pots to create different feels and fountain looks. I know a lot of people like little sprays, or overflowing flower pots, so get creative! This tutorial is designed to be as simple as possible, so we end here with a flow of water gurgling up over the rocks and making a light splashing noise. It really does sound like a small stream is flowing nearby.
FYI: You will want to keep this from drying out completely. Pond pumps don’t like to run dry and it will burn them out quickly if they run without being submerged. I built my 5 gallon bucket fountain 2 months ago and it’s down to about half now, and its hot springtime in Texas. So you shouldn’t have to do this too often, but maybe top it up when you go out and water your plants.
Parts featured in this article:
Support us on Patreon!
I hope you've enjoyed this tutorial! Please consider donating on our Patreon page! The more money we raise, the bigger and more elaborate project tutorials we can do for you!
Check out the Patreon Page