
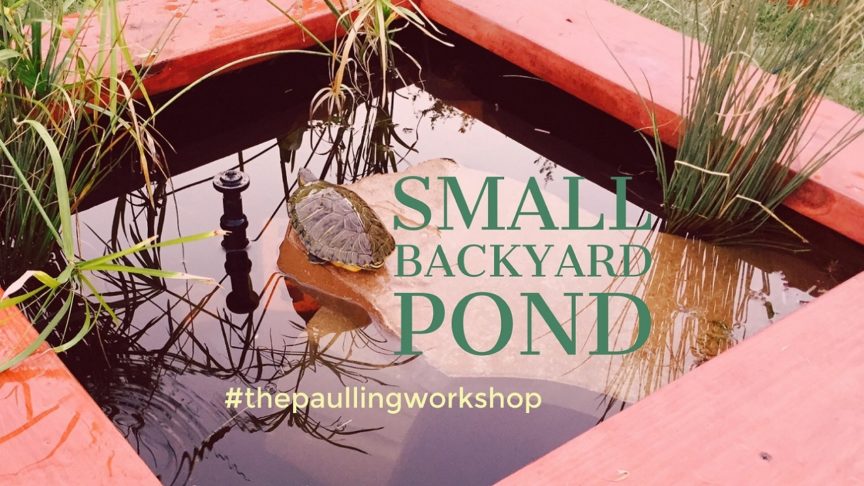
The finished pond. In the middle of our raised beds.
I’ve always been fascinated with ponds but a huge, in-ground pond wouldn’t fit or work well with our simple backyard landscaping, so I came up with the idea of adding a pond in the middle of our raised beds with the same look and layout to complement them. Hence the stained wood frame.
Building a pond is not really that difficult, but it does require a good part of a Saturday and quite a bit of digging. It doesn’t look deep in the picture, but it goes down below ground about 2 more feet, so it’s about 3′ deep total.
Required Parts
How to Build
Over time, the plants will grow and begin to look more natural that when you first plant them.
Step 1: Cut your side pieces and form the box frame. This is useful to do first because it helps guide your digging in step 2. Cut 2 of your 2″x10″x8′ boards into halves. These will be just under 4′ and you want all 4 boards to be the same size. Form them into a square, with each board butting up against the previous, and screw them together as square as you can. Use a carpenter’s square in the corner to be sure you get 90 degrees.
Step 2: Dig your hole. Mine is about 3′ of total pond depth (so only 2′ of digging), with 4 corner “shelves” at only 1′ depth to rest bog plants on. Each of these corner shelves are about 1’x1′. Make sure you know where your irrigation lines and any electrical or plumbing lines are before you dig. Call 811 if you’re not sure and they will come mark the yard.
Step 3: Finish the wood work. Make your top “bench” boards the same way you did the sides. Cut 2 more 2″x10″x8′ boards in half and lay them so they fit in a square on top of the side square. Cut 2×4’s to the same height as the side square boards (you’ll need 8 total – 2 on each side) and set them a couple inches in on each side face. Screw them to the sides, making sure your screws don’t go all the way through or you’ll poke your liner (bad), and then screw the top boards down to both the 2×4 supports and the side boards. This will make everything nice and strong so that you can sit and stand on the ledge without them breaking off. I used 8 screws per top board.
Step 4: Applying the liner. Lay out your liner in the bottom of the hole and get down in it. Make sure you dont have any rocks or sticks on the bottom or they can damage the liner. Some people even get felt pond liners for the pond liner, but that feels like overkill to me. Start in the middle of the bottom and press the liner around the edges as you move up the hole. You don’t have to be picky here because this will move and change as you fill up the liner.
Step 5: Fill up the liner. Get your garden hose and begin filling up the pond. If it’s not cold out, stand in the pond as it fills and press the liner into all the nooks and crannies of the pond walls as you go, making sure to leave enough liner overlap so that it doesn’t tear as the force of the water builds up on top of it. When in doubt, leave a little extra flap of liner in corners and don’t try to press it smooth. Stop filling when about 80% full.
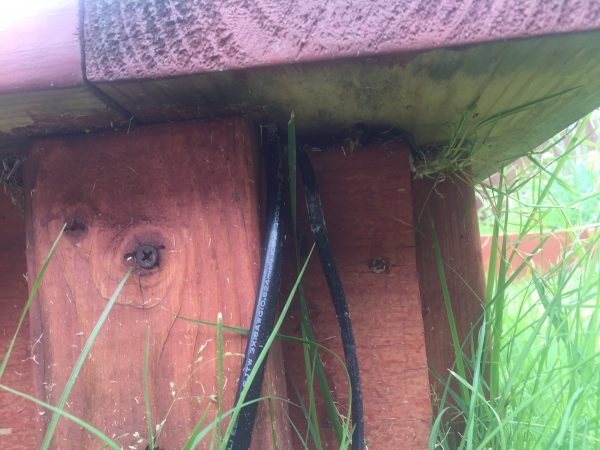
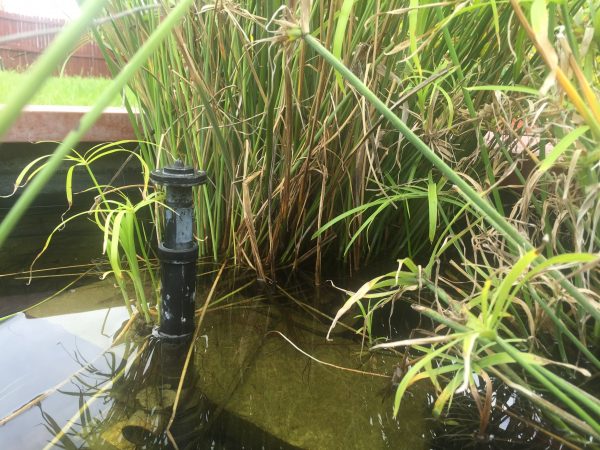
Underneath the top overhang board where a path for the electrical cords was chiseled. Its about 1/4″ deep into the bottom of the top board.
Step 6: Set the liner. To prevent the top of the liner from falling back into the pond, you’ll want to sandwich it between the wood sides and top. Remove the top bench and lay the liner over the edge of the wall (keeping a little extra in the pond side). Press the top wood back into place over the liner and rescrew in the top wood through the pond liner. From underneath the outside edge, use an exacto knife or scissors to trim excess pond liner away. This makes everything nice and tidy.
Step 7: Stain the wood. Go ahead and break out the wood stain, if you haven’t already, and stain everything that is visible, even the inside lip of the top overhang. Anything that is unstained and in contact with water will rot much quicker than stained/weather treated wood.
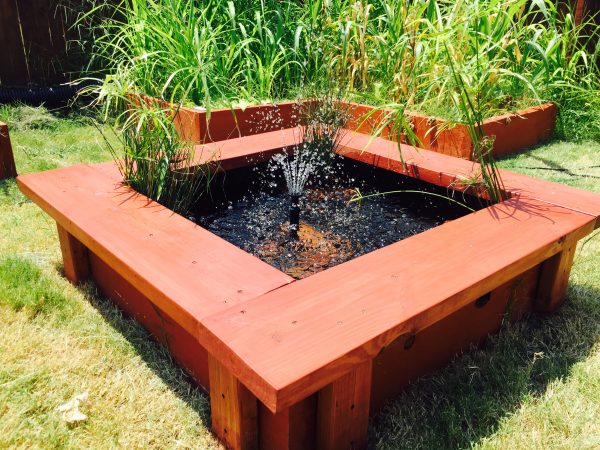
Step 8: Setup your pond pump and heater. You can set your pump on the bottom, but I recommend elevating it about 1′ if you can. I used an upside down clay pot sitting on the bottom to hold the pump up. This prevents all the muck that will accumulate from getting directly sucked into the pump and will make your filter last a lot longer between cleanings. You’ll need to chisel or drill out a small hole in the underside of one of the top bench boards so that the power cord can run out into the yard without going over the bench and looking unsightly. Also, set the heater in the middle of the pond and secure it so it doesn’t float up, and set a minimum temperature, and run the power cord out with the pump power cord under the top bench board. I have both of my devices plugged into a yard outlet that I bought for christmas lights that has water proof plugs and a timer, but I leave it on 24/7 when its cold so the heater doesn’t turn off. In the summer, I set the timer for just day time.

You can make out the metal planter shelf the pump sits on to keep it off the bottom. A cinder block next to the pump allows fish a good place to hide.
Step 9: Fill the pond up all the way
Step 10: Add fish and plants. Get some bog plants and some goldfish and you’re good to go. For a while, since the pond is totally clean, you will have to feed your fish flake food, but once the pond gets established and algae starts to grow, the fish can eat that and it will be more self sustaining, although I still feed them every now and again.
That’s it! Not too complicated, but definitely a day’s worth of work. Pick a nice, sunny afternoon and enjoy the process. There’s nothing quite like enjoying a cool summer evening out by the pond that you built with your own hands.
Parts featured in this article:
Support us on Patreon!
I hope you've enjoyed this tutorial! Please consider donating on our Patreon page! The more money we raise, the bigger and more elaborate project tutorials we can do for you!
Check out the Patreon Page