
After building myself a new, super charged desktop a few months ago, I felt a little bad leaving my poor wife with just her small little Macbook Pro, but she insists that she loves it and doesn’t want to trade it in, so in order to give her a bit of an upgrade, I came up with this. The basic concept is simple, a larger, external monitor, elevated to be eye level, with room for the laptop underneath, and the keyboard and mouse underneath that. Everything fits in a nice, neat little package on the desk and gives her a ton more desk space for notebooks, pens, tablets, and the usual coffee mug.
In the planning part of this project, I quickly realized that if we want the view of the screen to be centered on her vision, ie. not too tall or too short, we dont have a lot of room for compartments under the screen. We need enough space for the keyboard and mouse to slip under, and then we also need enough room for the laptop to sit on the center shelf and to plug stuff into it without being cramped.
This computer stand has a number of nice features including:
- A recess in the top for the monitor stand to sit down inside. This lowers the overall height of the screen, giving us more room underneath for storage, and stabilizes the screen from bumps of the desk.
- Another recess in the top for holding pens
- 2 bottom mounted 12v fans controlled by a side switch that provide cooling to the laptop while plugged into the system
- Cooling grooves cut under the laptop shelf for air flow across the whole laptop surface
- Rear, pull through cable management
- Pocket hole joinery for strength
Required Parts
This project is mostly a woodworking project, with some little bits of simple electronics built in for cooling.
You’ll need:
- 2×10 wood x 8′ long
- 2 x 12v computer fans
- An electrical switch (I used a full sized wall switch because I had one, but you can use a small toggle)
- Electrical Wire
- Pocket hole jig and screws
- 90 degree HDMI cable strain relief
For tools, you’ll also need:
- A circular saw or table saw that can cut at an angle
- To inset the screen base in the wood and to create air flow channels, you’ll need a handheld router
- For the fan mount holes, you’ll need a large forstner bit
- A soldering iron
- Electric drill (for driving screws)
How to Build
Step 1 : Cut the boards to size
I wanted this project to be symmetrical left to right, and consistent from front to back. I wanted the screen centered, and the outermost edges of the screen to be exactly the same width as the outermost edges of the wood at the widest part. So I started with that dimension and worked backwards to find how big everything could be. The max height was determined by actually sitting at the desk with the screen, placing it on books, and finding a comfortable height. Knowing the max base width and the max height in the middle, I could find all the lengths of the wood with some simple geometry.


 Step 2 : Assemble the outer frame
Attach the side boards to the top with pocket hole screws from the inside bottom. These are bit tricky because you are doing it at an angle. This is hard to clamp, and harder to hold straight while drilling. I recommend making the holes on a flat surface and then trying to butt them up for attaching after.
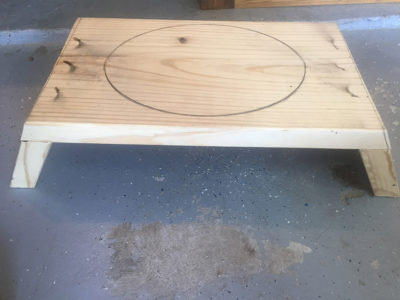
 Step 3 : Route out the top for the monitor
First, center and trace the monitor stand on the top board. Take your time and make sure its exactly in the center, measured from each edge. If this is off, the whole things look will be off. I also added a long cavity intersecting this oval and the front from right to left that is wide and deep enough to hold a few pens.
Setup your router with a 1/4″ rabbiting bit and work your way across the oval, cutting short passes each time, getting deeper and deeper as you go. If you try to do it all at once, itll look bad and you can break your router. Try increasing the depth by 1/16″ to 1/8″ each time. Go slowly around the edges so they maintain a uniform curve. This will create a TON of dust, so either do it in the driveway, or attach the router to some kind of dust collection. This is a lot of router work and there will be dust everywhere. Wear a mask and goggles. I made mine as deep as the stand is tall, so that it sits flush when mounted.
 Step 4, 5, & 6 : Prepare the shelf for fans, cut grooves for air and switch, and stain.
Do a dry fit of your base to make sure it fits just right. The side angles should be the same angle as the sides of the stand, and that will make your shelf level across. You want just enough room for your keyboard and mouse underneath, with the max remaining room for your laptop in the middle so its not too tight of a fit. The more room you leave in the middle, the more you’ll enjoy using this stand. If its too tight and you cant get your fingers in there to plug stuff in, its not worth using.
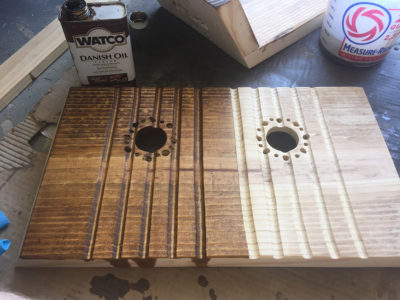
Figure out where you want your laptop to sit once put in the shelf, usually right in the middle towards the front, and then see if you can figure out where the hottest parts of your laptop are, and then we will try to mount the fans right under that. For a macbook pro, the CPU and GPU are located towards the back of the base, near the hinges, so I moved the fans back there. I cut one large hole in the middle, with several evenly spaced holes around that one (see picture) just for fun. I didnt have a large enough forstner bit to cut a huge hole for the whole fan assembly, so I got creative, because I wanted more airflow than what the large hole could give me.
Then, using a side following attachment on the router, I made semi-circular grooves front to back that will sit under the laptop and direct air out the front and back so that air cools the whole laptop surface, not just right over where the fans are.
Next, I routed out a recess on the bottom directly under the holes cut for air so the fans would actually disappear up into the 2×10. I didnt want the keyboard to hit them when pushed in. (You can see this in the picture in the next step)
Also, route a pathway for the cabling. Then, cut a hole for the switch mechanism in the side. I also had plans to cut an additional hole in the side for a mounted USB hub, but I couldnt find one I liked that was small enough for this project, so I just got a tiny 4 port hub and have it just sitting on the inside of the shelf waiting to plug into a computer. This is what the keyboard, mouse, and external hard drive are plugged into.
Then, I finished the assembly by staining the whole thing a medium dark walnut color. Let this dry.
 Step 7 : Electrical work
 Step 7 : Electrical work
Now that the base is finished, its time to give it some nice touches.
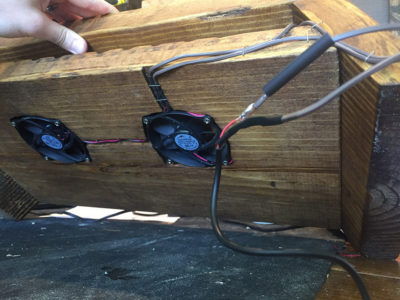
Mount the fans underneath the holes we cut in the recess sized for them and screw them to the wood.
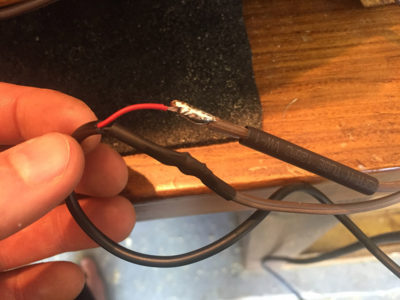
Get your electrical wiring cut to size by rough fitting it where it needs to run. Solder the wire from power plug red wire –> switch –> fan –> fan –> power plug black wire. Ill draw up a schematic for this. Use heat shrink wrapping or electrical tape to cover the soldered joints.
I used small staples to pin the wires in place in the grooves once they were soldered and cut to length. Be really careful not to staple into the wire covering, or it will short the wires together.
.
 Step 8 : Connect everything, setup the monitor, and turn it on!
 Step 8 : Connect everything, setup the monitor, and turn it on!
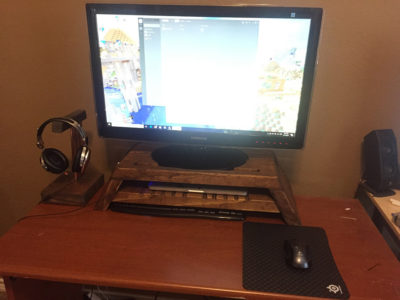
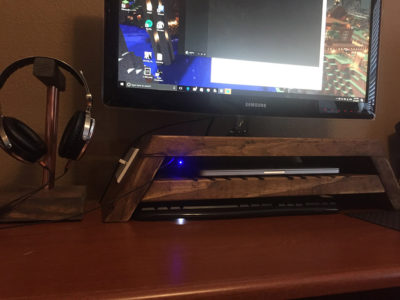
The last step is to setup your monitor, slide in the laptop, plug in the USB hub and 90 degree HDMI cable, flip the fan switch, and enjoy your new desktop experience!
Support us on Patreon!
I hope you've enjoyed this tutorial! Please consider donating on our Patreon page! The more money we raise, the bigger and more elaborate project tutorials we can do for you!
Check out the Patreon Page
Comments
I have been looking for some DIY options in laptop stands. The design you have shared here seems easy to build and quite unique too. I am sure to try this myself and see how it comes out to be. Thank you for sharing this information here for readers like me. Looking forward to more such interesting posts.