In this tutorial, we’re going to be setting up a raspberry pi terraria server. Terraria is a really fun casual but complex game you can play with friends. Kind of like 2d Minecraft. By setting up a permanent server, any of your friends can login to the world at any point and play, with or without you having to be online to let them in to the world. Don’t let the length of this process dissuade you! All of the work to get this up and running is already done and you just need to follow the prompts to tell your raspberry pi what to do.
Setting up your Raspberry Pi
In this tutorial, I’m going to assume you’ve got a raspberry pi up and running with Raspbian OS, either with a monitor/mouse/keyboard, or headless on your network. Either way you need to have command line access.
- Make sure you get your raspberry pi up to date with the following commands.
sudo apt-get update
sudo apt-get upgrade
2. Now to use the terraria server program, we need another program first called Mono. Mono is an open sourced implementation of Microsoft’s .NET Framework. To install mono, first we need the Ubuntu key server.
To add this keyserver, type in the following:
sudo apt-key adv --keyserver hkp://keyserver.ubuntu.com:80 --recv-keys 3FA7E0328081BFF6A14DA29AA6A19B38D3D831EF3. Now we can download the Mono repository with:
echo "deb http://download.mono-project.com/repo/debian stretch main" | sudo tee /etc/apt/sources.list.d/mono-xamarin.list4. Run another update and upgrade using this repository
sudo apt-get update
sudo apt-get upgrade
5. Finally, install Mono:
sudo apt-get install mono-completeSetting up the Terraria Server
The Terraria server software is called “TShock”.
We’re going to use version 4.3.26, which is the most current as of this writing (1/19/20), but you can go to TShock Github to see the most recent version, then just use those numbers in place of 4.3.26 in the following codes.
- Make the folder for the server and enter it
mkdir ~/tshock
cd ~/tshock
2. Download the latest version of Tshock
wget https://github.com/Pryaxis/TShock/releases/download/v4.3.26/tshock_4.3.26.zip
3. Extract the zip file we downloaded
unzip tshock_4.3.24.zip4. Run the server
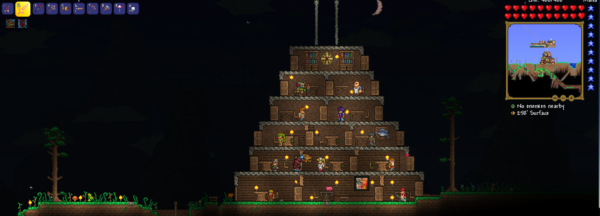
mono TerrariaServer.exe5. You’ll be asked a number of questions about what kind of setup you’d like for the server: I’d recommend a small or medium world size unless you have a new raspberry pi 4 with extra RAM.
The world will generate (this takes a long time: mine took 30 minutes).
Enter the world number (usually 1) when it finishes generating and setup the last few things: max number of players (up to 8), the server port (7777 default) and the server will start!
Now, you’ve got a server up and running and can join the game! But there’s still a few things left to do.
Join the Server as an Admin
In the command line, you’ll see a notice that says “To become SuperAdmin, join the game and type /auth ######. This token will display until disabled by verification”. So login to Terraria, and type that code in. Your user will now be the in game admin, and you can run admin codes.
Once you type in the code, follow the onscreen instructions to create a permanent admin user. It can be anything you want: could be your steam user name or anything. Just dont forget it. You can create multiple admin users as well.
(In Terraria)
/auth ######
/user add [username] [password] superadmin
/login [username] [password]
/auth
Setting up the server automatically at Boot
So now you’ve got the server running, but we want it to start up automatically when the raspberry pi comes online, otherwise you have to start it manually each time you lose power. To start up, we need some config files, and then we tell the raspberry pi to run these config files when it comes online.
In terminal:
sudo nano /~serverconfigThen write the following in that file:
maxplayers=8
port=7777
worldpath=~/.local/share/Terraria/Worlds
world=Worlds/servername.wld
Then ctrl+x, Y, then enter to save.
By default, terraria uses a folder called “My Games”, and the space in there causes an issue. In the above file text, I’ve changed “My Games” to “Worlds”. So make sure any server files you’ve created end up in a new folder called “Worlds”.
Then, servername.wld is the server file.
Now, open the Tshock config file with
nano ~/tshock/config.jsonJust make sure the port and max players agree with the server config file we just made above.
Start the server with a script
sudo nano ~/server-start.shand write the following in that file:
#!/bin/bash
mono TerrariaServer.exe -config serverconfig
Save the file like we’ve been doing and make it executable with
sudo chmod 755 ~/server-start.sh.Autostart the Server script
sudo apt-get install tmux
sudo nano /etc/init.d/terraria-autostart
Write the following in that file:
#!/bin/sh
su - pi -c 'tmux new-session -d "sh /home/pi/server-start.sh" '
exit 0
Save the file. This uses the default raspberry pi user “pi”, so if yours is different, change ‘pi” to your username in the script above.
sudo chmod 755 /etc/init.d/terraria-autostart
sudo nano /etc/rc.local
And add this line before the exit 0 line
/etc/init.d/terraria-autostart
Play with Friends outside your Home Network
To allow your friends to connect to you, you’ll need to do a couple of things.
- Bind your Pi to a hostname
We are gonna use a free no-ip hostname for this. In the text, ill use “mypi.ddns.net”, but replace that text with whatever yours is.
Install the No-IP Dynamic Updater
This program will regularly update your free hostname with the current IP address of your house. Unless you know you specifically have a static IP address, you’ll need to do this.
cd /usr/local/srv
sudo wget http://www.noip.com/client/linux/noip-duc-linux.tar.gz
sudo tar xf noip-duc-linux.tar.gz
cd noip-2.1.9-1
sudo make install
(enter the credentials of your no-ip account when asked)
Automatically Start the DUC on startup
sudo nano /etc/init.d/noipCopy the following into the file and save with ctrl+x, then y, then enter
#!/bin/sh
case "$1" in
    start)
        echo "Starting noip2."
        /usr/local/bin/noip2
    ;;
    stop)
        echo -n "Shutting down noip2.\n"
        pkill noip
    ;;
    *)
        echo "Usage: $0 {start|stop}"
        exit 1
esac
exit 0
Run the following:
sudo chmod 755 /etc/init.d/noip
sudo nano /etc/rc.local
Then add this on a new line just before “exit 0”
sudo /etc/init.d/noip startSave with ctrl+x, then Y, then enter.
Now we have a hostname that points to the Pi from outside the router, but the router also needs to know to pass the info through. Log into your router and forward ports 22 and 7777 to the IP address of the Pi. Port 22 is for the DNS hostname updater, and 7777 is for the Terraria server.
Restart your Pi with:
sudo rebootYou’re Done!
Now, when your Pi reboots, it will do 3 things:
- a script will run updating the IP address of your public hostname for the server
- another script will run telling the terraria server to start up
- a third script will run telling the server what configuration to start with
Now go forth and enjoy the server!