
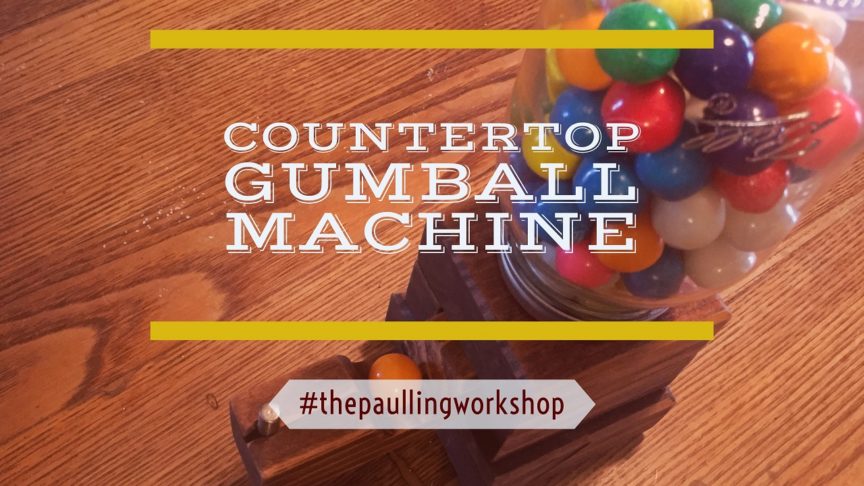
 Growing up, my grandpa had a wooden gumball machine that he built in their kitchen that would be the first place my cousins and I would run to when we got to their house. We’d grab a gumball and then go about our business, but that was always the first stop. I wanted to recreate that magical device and discovered its much easier to do that I had thought when I was a kid. Let’s get down to it. Here’s what you need:
Required Parts
- 2″ thick – 4″x4″ block – for the base
- 2×4 scrap wood – for the top and sides
- 8 to 10″ long piece of 2×2 – for the slider
Woodworking Skill
Time involved
Project Cost
Difficulty compared to other projects on this site
How to Build
Start by cutting your pieces to size. This whole project, for me, was built with scrap wood, and it doesn’t take much, so gather up some boards and start trimming. You need the following:
- Base = 2″ thick x 4″ x 4″
- Top = 2″ thick x 3″ x 3″
- Slider = 8 to 10″ long x 2″ x 2″
- Sides = cut from 2×4 = this one requires some math to get right
- Length is the same as the top = 3″
- Width = (3″ – actual width of slider)/2
- Height = Actual height of slider + 1/8″
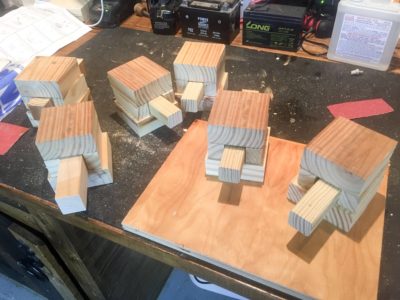
Multiple machines in progress
To save time, build a whole bunch of these at once! It’s easier to do several at the same time and move through them in stages than to finish one and start a second.Tooltip
These equations for the sides give you just enough room for the slider to move freely in and out, but not so much that the slider can move left and right or up and down.
To check to make sure you got it right, align the two sides and the slider and squish them all together. They should be a bit skinnier than the top pieces they fit underneath and the side pieces shouldn’t stick out the front or back.
When you attach the sides, you move them a hairs width away from the slider so they match up with the side of the top piece and that gives you the room.
Now that you have everything the right size, we can start assembly.
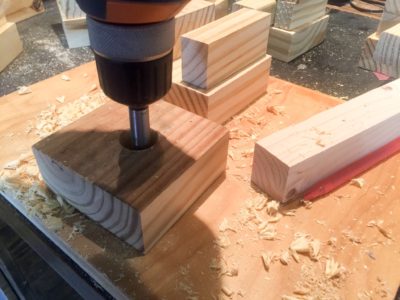
Drill a hole in the center of the top block.
Begin by drilling a hole in the center of your top block that will be just a bit bigger than your intended gumball size. Standard gumball sizes are .5″, .87″, .95″, and 1″, and they get bigger from there. I used .87″, so I made a 1″ hole with a forstner bit.
Attach the sides to the top block with predrilled holes and long wood screws.
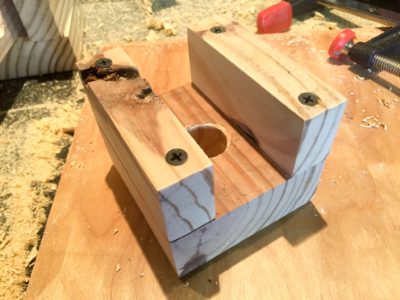
Attach the sides. Line up with the front and back, and the two sides of the top block.
Using the 45 degree router bit, cut a chamfer around the top edge of the top block, the top edge of the bottom base block, and the inside of the gumball drop hole. This is all for decoration, but it gives a very finished look to the whole thing when you are done.

Attach the bottom block with 4 wood screws.
Center up the bottom block on the side blocks and screw it in predrilled holes just like before.
Now that the base is assembled, we need to cut a notch in the slider for the gumball to fit in once it drops out.
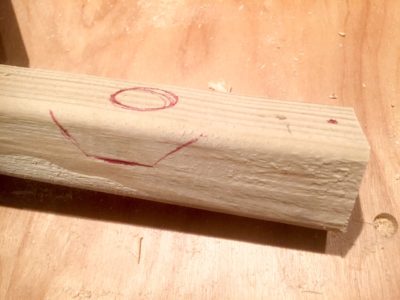
Sketch out a slot for the gumball to fall into.
Sketch out a slot big enough to hold the entire gumball, with gently sloping sides that will face front and back on the slider. Cut this out with a jigsaw or drill bit and chisel.
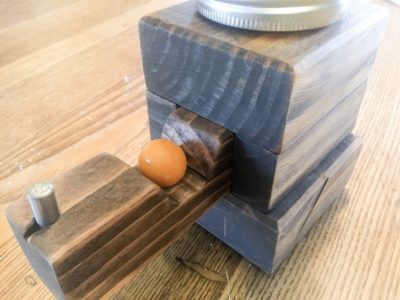
Once you have the slot cut out, add another hole at the bottom of the slot that will act as a “holding hole” for the gumball when it falls in. The idea is that the base of the gumball sits a bit further down so that it doesn’t roll off the side of the slider when you pull it out. I used a 1/2″ drill bit to add a small hole in the center.
Next, you need to add stops to the slider so that it doesn’t come all the way out. I put the one in the front on top (see placement of the red marker dot in the picture) and a mirrored one in the back, but on bottom. Drill the hole down 1/2″ and then use a 1″ dowel rod or metal pin in the hole to secure it. Don’t glue it in yet, but you will eventually. You could also opt to use a nail or screw sticking out, but that doesn’t look as nice.
Applying the finish.
Now that everything is put together, its time to do the finish.
Start with 100 grit sandpaper and go over everything to make it smooth. Work your way up to 220 so that it’s also soft, but you can stop whenever you reach a smoothness you like, or your arms get tired.
Apply your wood stain with a felt brush and let dry for 15 minutes. Then wipe of excess with a towel or cloth so it doesn’t get tacky.
Once the surface is dry, apply Cutting Board finish (aka. mineral oil) with a cotton rag all over each surface, being especially careful to cover any surface that will come in contact with gumballs. This is a food safe finish and will prevent any wood flavor from being absorbed by the gumballs.

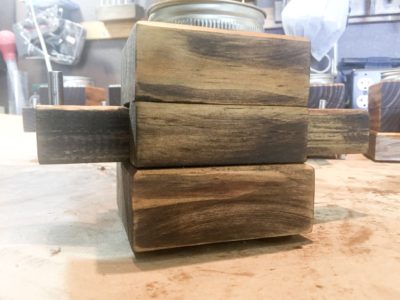
Add the lid of the mason jar to the top.
Next, take the ring off one of the canning jars and set it on top centered over the hole. I used two finishing nails to attach it with a bit of glue on the underside, but now that I think about it you should probably use small screws if you have them. Be careful to get the head of the nail/screw all the way down as much as you can because the jar won’t screw on all the way if it’s not down far enough.
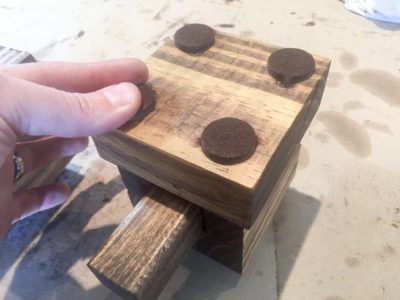
Applying felt feet.
Apply the felt feet on the bottom to cover screws and protect whatever surface you choose to put this on.
Go ahead and put the slider into it’s spot and secure the ends with the dowel rods by gluing them in place. This prevents the rods from coming out, which in turn prevent the slider from coming out.
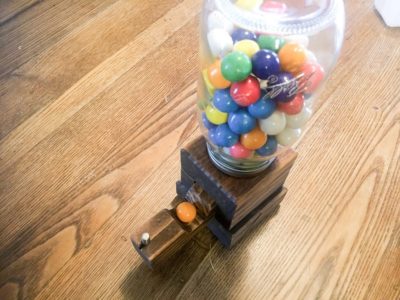
To finish up this project, fill up the mason jar with gumballs, and attach the block upside down to the mouth of the jar. Once it’s screwed on, you can flip the whole thing over and get yourself a well earned gumball!
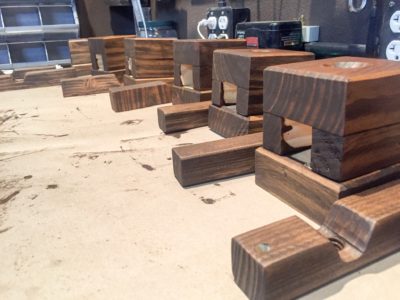
A whole bunch of gumball machines in progress.
Occasionally, the gumballs might get stuck due to settling and you have to shake it up and down once or twice to get a gumball to fall into the hole. You’ll get the hang of it quickly, and it’s all part of the fun! Use it to reward your kids (or yourself) for doing something well, or give these out to friends and family for Christmas. If you have enough scrap wood, all you need to buy are mason jars and gumballs, and you can churn out a whole bunch. I made 8!
The finished machine!
Support us on Patreon!
I hope you've enjoyed this tutorial! Please consider donating on our Patreon page! The more money we raise, the bigger and more elaborate project tutorials we can do for you!
Check out the Patreon Page