
 So my wife and I share a google calendar, and she does a pretty good job of putting things on there that we have scheduled to do, but my main problem with the system is that I forget to look at the calendar app in the mornings and am generally reminded about an event when its time to go. So I needed something that could help me stay on top of our calendar without putting in more effort than the bare minimum to do so. So I did a project that required a pretty good bit of effort to exhort minimum effort in the future. Yay engineering….
The idea came from a design I saw years ago, and some research earlier this week led me to the same conclusion now that I had then….
“This is great and all, but it looks terrible…” So I came up with a plan to make it look better and blend a little more seamlessly into the normal decor of a house.
I have a TV that was my grandfathers and was one of the things I got when he passed, and I know technology is a dumb thing to be sentimental about, because technology isn’t really lifelong and becomes obsolete really quickly, but I have held onto it for years without throwing it out even though we have no use for it simply because it was his. And now it has a home. Its a decent 720p monitor, but I’d recommend a 1080p screen if you’ve got one, just because you can pack more info on it.
I wish I could tell you how much money is tied up in this project, but I actually only spent money on 1-1×3 board and an extension cord and already had the rest of the stuff. But here’s what you need:
- A screen of a decent size (preferable if already really skinny. I started with a very thick monitor and most of the time spent was disassembling it and compacting it down to one layer) A recommended screen: Dell 23″ S2317HJ
- A raspberry pi (preferably a model 2 or 3) or a mac mini for some serious computing power, but thats overkill and wasteful.
- A wifi USB connector for the Raspberry Pi
- Connection cables and power cables
- Wood frame (I used a 1×3 and some old 2×4’s, but you could build a more “craftsman” cabinet if you choose to spend the money.
The Build
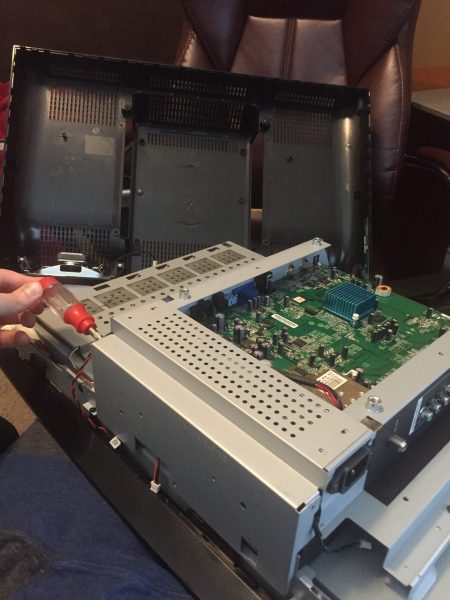
- Disassemble the tv/monitor. Remove all the plastic frames, stands, supports, ect. Make this thing as skinny as you can get it. You’ve got about 3″ of depth before it starts to look ungainly on your wall. If you cant do that, get a smaller monitor. CRT TV’s are just straight up out.
- Figure out how to align all of your components on the back of the LCD panel WITHOUT ANYTHING TOUCHING. This is crucial. Nothing can touch each other and nothing can touch the metal of your LCD. I used some rubber 1/8″ mat that I have to insulate all the circuit boards and that worked pretty great. Tape that down and then tape down the boards to it. Nothing blows up.
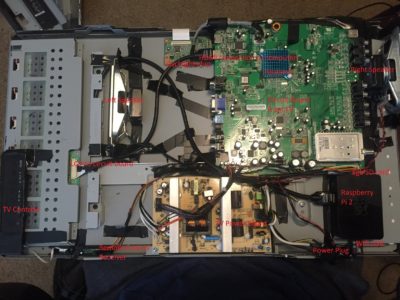
- Connect everything. Route the cables around and around so that you have minimum overlapping to prevent electrical noise generation. Don’t just pile the cables up on top of each other. Tape everything down. It doesn’t have to be pretty. Its on the back. You are left with the picture on the left..
The wood frame:
If you have a SUPER SKINNY monitor, maybe you can just hang what you got, but mine still ended up being about 2 1/2″ deep, so I needed a frame to hide the sides, and my aluminum frame around the LCD didnt look good either.
My wood frame is simply 2×4’s cut so that the inside diameter is exactly the outside diameter of my LCD + a tiny tiny margin. 1/16″. It fits snug if you do it right.
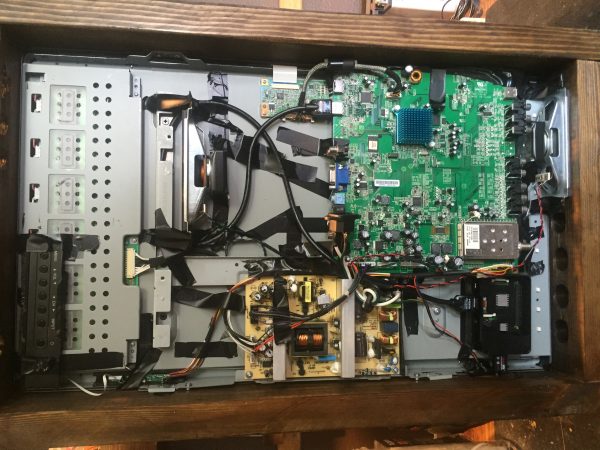
The snug fit between the edge of the LCD and the wood frame. Notice the air holes drilled in the bottom (to the right) for airflow and the speaker.
I realized that my 2×4 frame ended up being about 1 1/2″ deeper than it needed to be, so I ran the boards lenght-wise down a table saw and made them 2x3ish ‘s. Just to remove some of the depth. My components are now closer to the wall but still not touching.
The front of the frame is 1×3 select pine with a real smooth finish. To make the 45 degree cuts, start with 1×3 boards that have the same length as the outside edge of your 2×4 frame and then cut 45 degrees at each end.
(Outside length of LCD + 2x(width of 2×4’s)) = (Outside length of LCD + ~3″) –> cut 45 degrees.
Be super careful with the cutting of the 45 degree cuts and youll get a nice frame that fits over the top of the screen and 2×4 frame. Nail it on with finishing nails, sand everything until super smooth, and stain whatever your hearts desire. I use Minwax stains because my grandpa would have approved. Let dry.
Now that you have the frame built, lay the LCD panel inside and it should fit snug. Mark where the following components are:
- The remote control receiver
- The power button
- The USB ports of the raspberry pi
- The speakers (only one of mine fits on the outer edge so the other is just in the middle)
Take the LCD out again and use a forstner bit (mine is 1 1/8″D) to drill out holes for these things so you can reach through the frame and use these buttons/ports/features. This allows you to plug in keyboards, press the power button manually, or use the remote. I also have three holes drilled in the top and three more in the bottom on the opposite side for passive air cooling and flow. (So far after a few days of running this seems to be enough to keep it cool. No need for active noisy fan.) Stain the inside of these holes.
Mount the frame to the wall with STURDY hooks. I used two that each hold 35 lbs, and this whole thing weights about 20 lbs, but I wanted to be sure.
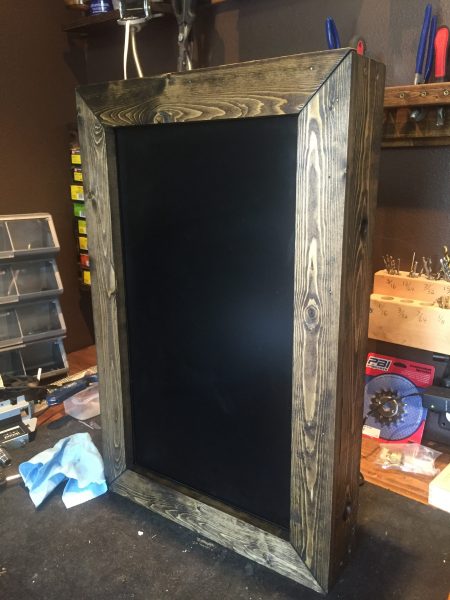
The completed wood frame with monitor off.
The Programming
This part is not as hard as it sounds, but it does take some work if you aren’t familiar with setting up a raspberry pi. As far as raspberry pi projects go, this one isnt that hard, but its still pretty technical.
The basic idea here is to run an operating system called “Raspbian” and then boot up automatically in “kiosk mode” to start displaying the information you want and hiding the operating system. Raspbian is a version of linux that runs smoothly on Raspberry Pi’s and looks kind of like old school windows. Kiosk mode is a function of Chromium (Google Chrome) puts up a full page webpage while hiding everything else. And the software the I used to create the information dashboard is a currently beta product called DAKboard.
Download and Install Raspbian OS
Go to https://www.raspberrypi.org/downloads/noobs/ to get started with raspbian. Then follow the guide here: https://www.raspberrypi.org/help/noobs-setup/Now that you have the basic operating system, we need to tweak it a bit.
In terminal run : raspi-config
Choose the following options : Boot to desktop, enable SSH server, set proper time zone
Set your wifi name and password:
In terminal:
sudo nano /etc/wpa_supplicant/wpa_supplicant.conf

and add :
network={
  ssid="YOUR_NETWORK_NAME"
  psk="YOUR_WIFI_PASSWORD"
}
Save with ctrl+x, press y, and exit.
If you want to mount your display vertically you can change the rotation with the following:
In terminal :
sudo nano /boot/config.txt

and add:
display_rotate=1
Save with ctrl+x, press y, and exit.
Reboot with : sudo reboot
Upon restart, open terminal and type:
sudo apt-get install chromium unclutter vim
Chromium
Chromium isn’t included in the Raspbian Jessie repository (as of 12/9/2015). Instructions to download and install on Raspbian Jessie are here.Then finally, we can tell it to load up our DAKboard page on boot.
Create a DAKboard
Go to www.dakboard.com and create and account there. Its free (for now) and it allows you put in your google calendar information, your zip code for weather, and folder in your dropbox that you’d like to get background pictures from. There are some other options too, and its pretty straightforward, so set it up however you’d like your information to be displayed. I also pull in Facebook Birthday’s Calendar and use the weather underground option for weather. (It takes more setup but looks better.)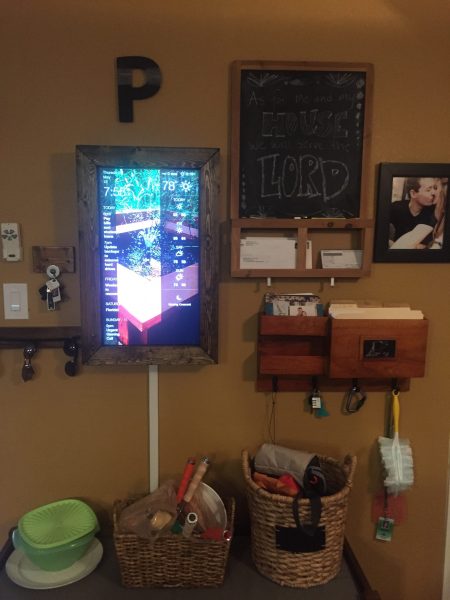
The notification board up near our garage door, next to my keys and sunglasses.
Raspbian Wheezy:
sudo nano /etc/xdg/lxsession/LXDE-pi/autostart
@xset s off
@xset -dpms
@xset s noblank
@chromium --noerrdialogs --kiosk --incognito http://dakboard.com/?p=YOUR_PRIVATE_URL
Raspbian Jessie:
sudo nano ~/.config/lxsession/LXDE-pi/autostart
@xset s off
@xset -dpms
@xset s noblank
@chromium-browser --noerrdialogs --kiosk --incognito http://dakboard.com/?p=YOUR_PRIVATE_URL
Reboot again and you will see your Dakboard page come to light as soon as the computer starts up. (Give it a minute.)
As you can see, ours is by the backdoor next to my keys and sunglasses holders and next to the mail sorter. The clock is visible from the other rooms and the kitchen, and the calendar and weather are visible from a little bit closer.
Optional: Turn the monitor on and off automatically at a set time.
Download this script: rpi-hdmi.sh. Download as a .zip file and unzip it to your downloads folder.
Login to the pi with WinSCP and put that file in the /home/pi/rpi-hdmi.sh folder.
Now, make it executable.
chmod +x /home/pi/rpi-hdmi.sh
Now we tell the Pi what time we’d like for it to turn on and off the screen.
Open the cron editor:
crontab -e
Its possible you dont have the cron editor installed, so the pi will ask you if you’d like to use a different one. Choose the nano editor. Option #2.
Add the following lines at the bottom of the file
# Turn HDMI Off (22:00/10:00pm)
0 22 * * * /home/pi/rpi-hdmi.sh off

# Turn HDMI On (7:00/7:00am)
0 7 * * * /home/pi/rpi-hdmi.sh on
The first number (0) is minutes, and the second number (22 & 7) is the hour. In this example, the monitor turns off at 10pm and turns on again at 7 am. This doesnt turn off the Pi, just the monitor.
Then press ctrl+x to save and then y, then enter to exit.
Parts featured in this article:
Support us on Patreon!
I hope you've enjoyed this tutorial! Please consider donating on our Patreon page! The more money we raise, the bigger and more elaborate project tutorials we can do for you!
Check out the Patreon Page